 by Jeremy McCombs, CTSP, and Jack O’Shea, BCMA
Imagine the amount of information shared with young, and often inexperienced, arborists each day in the field. These newest members of the tree care industry are exposed to numerous training tactics and safety techniques – some good and some that bear the consequences of critical injuries and worse. With the right training and techniques, paired with an appetite for safety, our industry has an opportunity to guide the next generation of arborists as they further their craft and explore advanced practices.
While drafting field discussions with our fellow arborist trainers recently, we felt it would be valuable to catalog the basics of rigging. As you carefully review the basics of rigging, you can imagine how these principles and processes work. If you have a good team and can begin low and slow, any configuration is understandable. For those of us who have spent a good amount of time in the industry, we have undoubtedly learned many of our techniques by setting up a rigging “problem” during lunch or after work, using a rope bag filled with tools for a weight.
It is worth noting that rigging limbs and pieces of wood out of trees can be unforgiving. If you get it right, you’ll want to try it everywhere. If you get it wrong, the consequences can be deadly.
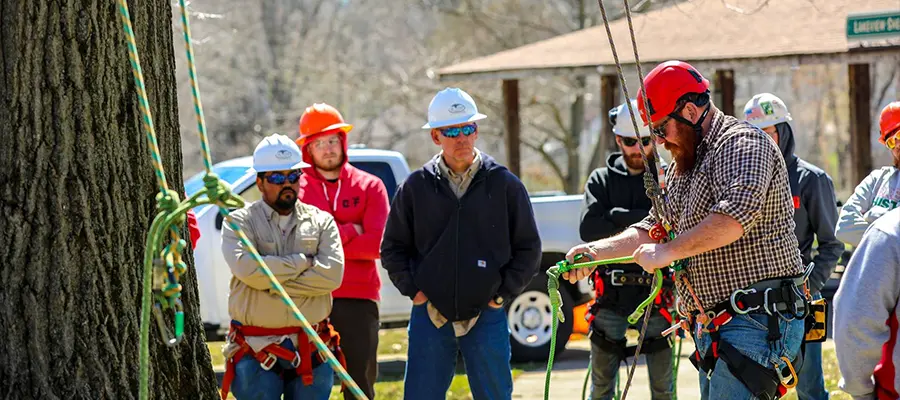
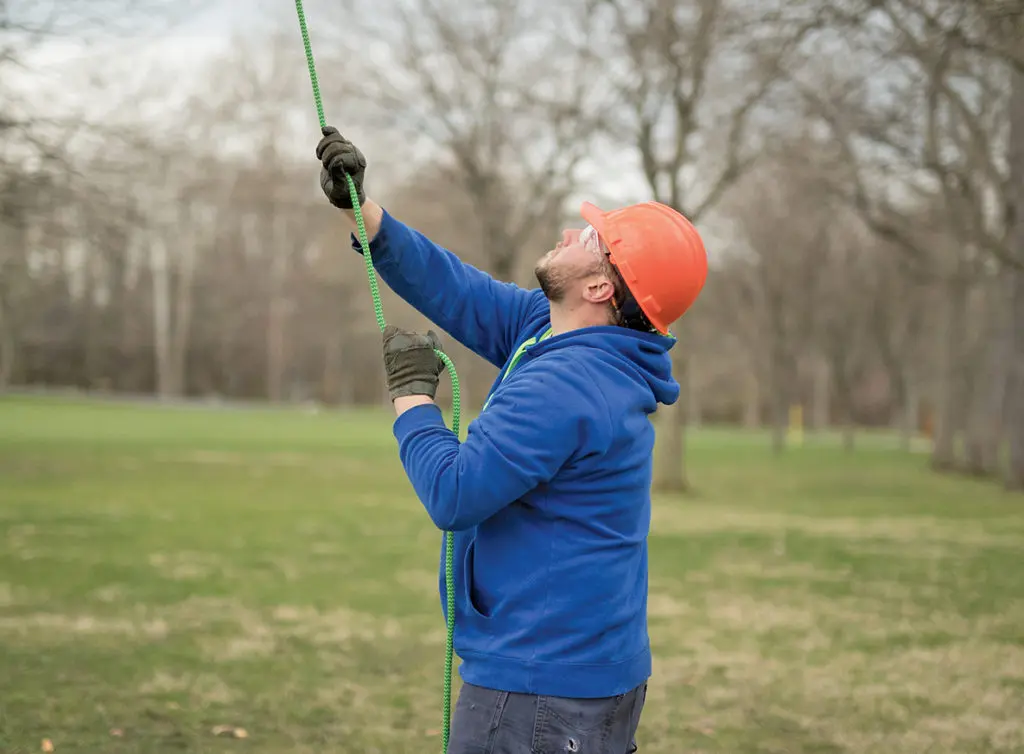
The following discussion is not a blueprint. When reading this article, if you are unfamiliar with the knot we are mentioning or are uncertain about what a term means, that is an indication that you are not quite ready for this kind of advanced discussion. That is perfectly fine. Be sure to explore the additional resources available and circle back once you are ready. Much can be learned from speaking with experienced arborists within your network, by watching educational videos and by reading industry articles. Advanced techniques and practices such as rigging are best taught in a class or in a one-on-one setting. (Photo 1) This allows for the subject to be appropriately integrated by the intermediate or advanced student. We expect many of you to fall in the category of educated and savvy, and we hope this content will whet your appetite for more.
Control: Why is rigging needed? It can help prevent power-line strikes, property damage, worker injuries and more. Rigging takes much of the “guesswork” out of cutting large branches.
Setup: Rigging Setup Considerations
Where is the pulley (rigging block) located? Will the limb break with the added weight? Cut pieces must swing downward in a smooth, yet controlled, fall. If you are in the way, the load will take you with it. If your rope is in the way, one rope running will slice through another standing rope in no time.
How strong is the tree? A tree rigged properly is a crane to lower, swing and lift pieces. What defects are present in the trunk and any branch unions below the rigging point(s)? Examine and determine the hazards of adding weight above or near included bark. Look for decay columns. A basic understanding of wood strength and flexibility is required for rigging setup. This comes with time and experience.
How big are the pieces you are taking? Wood-weight considerations are imperative in rigging! Do your homework, get out the green-log-weight chart and figure weights before you tie them on. After a few, you get a feel for the math and it does go quicker. You can order a green-log-weight chart from TCIA at tcia.org/shop. There are also apps. A laminated chart is handy, as it can be left on the ground or dropped, where a smartphone requires additional care.
Start your rigging operation with a couple of smaller cuts to “test” your system. A good rule of thumb is to try 50% of the weight you want to effectively control. This gives you, the ground professional and the tree trunk a test.
Rope
Rope always has advantages and limitations. Is your rope strong enough for the job? Working load limit (WLL) is 20% of breaking strength for non-life-support line use. Double-braid, 5/8-inch rope has a breaking strength of about 10,800 pounds. This translates to a little less than 2,000 pounds WLL. Dynamic forces can multiply to 10 times the weight of the material being lowered haphazardly or too quickly. A person’s climbing ropes should be at least 5,000 pounds test, with a working load limit of at least 500 pounds.
You may need to use a larger rope when performing dynamic (top-down) rigging. That is due to possible forces exceeding the safe working load for the smaller lines. A smaller rope may work once. But the pieces get heavier, in general, as we climb and rig lower on the tree.
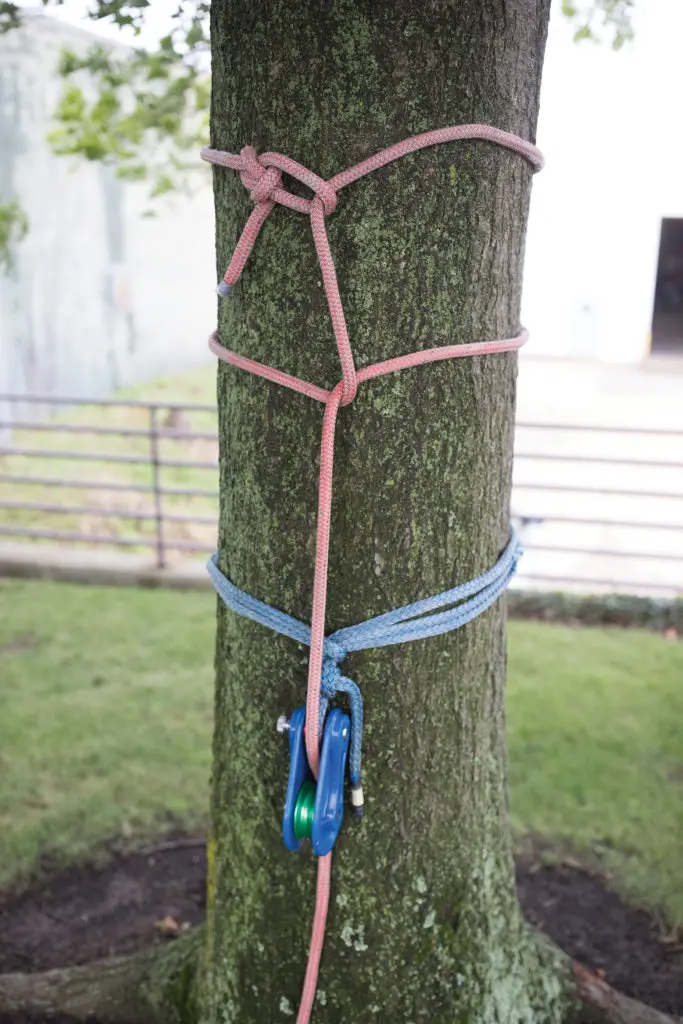
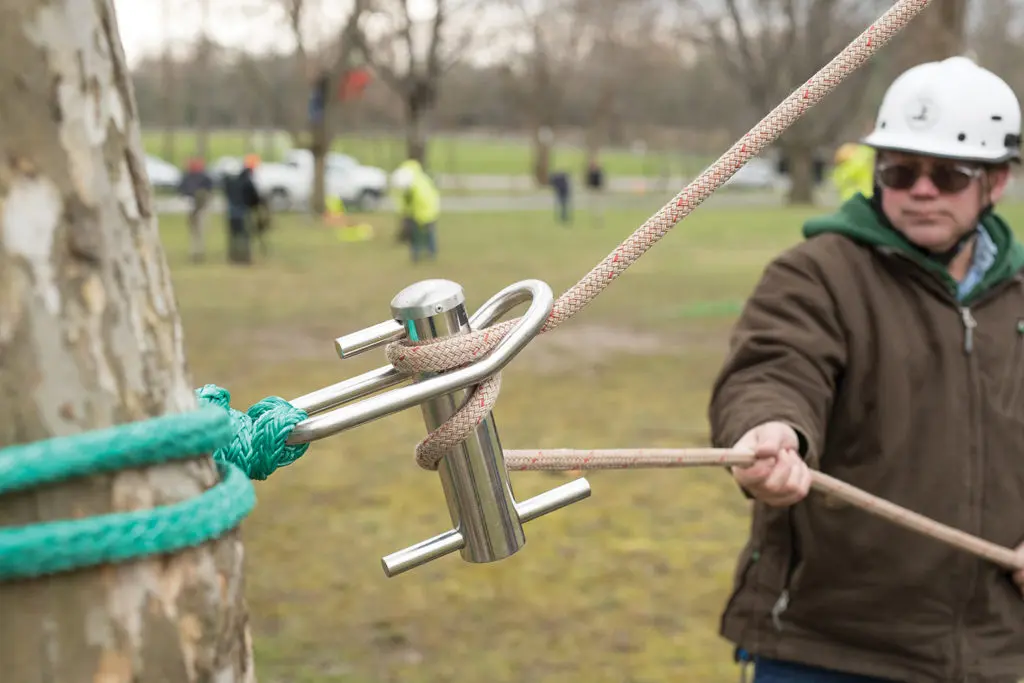
Block/Sling
What type of pulley (rigging block) are you using? Do you know your sling rating? Look for tags on the sling or ask your equipment provider for ratings – and write them down!
What is the preferred hitch for fastening to the stem? The cow hitch is often our choice. The timber hitch works for larger stems when it is installed correctly (wraps going the right direction, minimum five full wraps extending back more than halfway around the stem). The timber hitch can fail under heavy loads and unwrap if tied incorrectly! We use the clove hitch in some applications and give the same warning. Finishing a knot after the tie, dress and set may mean following with a timber hitch or stopper knots, half hitches, etc., to make the knot fast to its standing line during shock loads.
Remember to attach the block/pulley as close to the tree as possible, especially in negative-rigging scenarios. A pulley attached too loosely allows dramatic directional changes to forces applied at the point of attachment.

Style: Positive vs. Negative Rigging
Negative rigging is top-down or dynamic rigging involving scenarios where the rigging point (pulley/block) is below the material being controlled. This is the least desirable rigging method in terms of free fall, but is often key to tree removal. Remember our dynamic loading: force of a piece of 50-pound wood falling three feet can be three times the weight – plus one unit more of weight added to it. Call it four times the weight.
Positive rigging is static rigging where the pulley is above the rigging point and the system is pre-loaded (usually by the ground crew) to reduce dynamic force on the system components. This rigging scenario is the preferred method for lowering limbs, as it provides more control with overstresses on the system.
Friction: Lowering Device Uses and Limits
The last part of all this is friction. The best assistant in the world cannot hold more than his or her weight.
The Hobbs lowering and lifting device needs to be set up correctly for the job being performed. The three different set-up requirements are as follows:
Setup is only for light riggings, such as trimming and small removals, so you mount the Hobbs with the spikes covered by the pad and plate. The weight limit is 1,000 pounds WLL (including dynamic forces).
Setup is for medium-sized removals, with the spikes exposed and embedded into the trunk wood. The weight limit is now 2,000 pounds WLL (including dynamic forces).
Setup is for large removals and dynamic loading forces (top-down rigging requires this setup no matter the tree size). The device operator must cut in a notch for the Hobbs device to set securely into the trunk wood. Now the weight rating is 3,000 pounds WLL (including dynamic forces).
NOTE: All this information is located on the Hobbs device backplate.
Remember, the Hobbs device lifting WLL is always 1,000 pounds maximum for any setup!
Port-A-Wrap
Yes, there are other devices in use, and each has its advantages and disadvantages.
Port-A-Wrap lowering device limits and use:
The Port-A-Wrap has a 2,000 pound WLL, but is limited by sling size, tree strength and knot choices.
A Port-A-Wrap is more portable and is simpler to set up. It is also less expensive.
The Port-A-Wrap setup is different due to attaching it to the stem via an eye sling with a cow or timber hitch. Make sure your sling is tied and set well before lowering any weight. Next, lower two or three test pieces and then check the system again.
Remember, rigging limbs and pieces of wood out of trees can be unforgiving. Start low and slow, and stay safe.
Jeremy McCombs, CTSP and ISA Certified Arborist, is a traveling crew trainer with ACRT Arborist Training. In 2011, he earned an Emergency Medical Technician (EMT) certification and Low Angle/High Angle Ropes Rescue training through Columbia College’s Emergency Medical Services (EMS) program in Sonora, California. McCombs has been involved in the tree care industry for more than 25 years and has dedicated more than a decade to wildland urban-interface vegetation management in the State of California.
Jack O’Shea, BCMA, TRAQ, is a traveling crew trainer with ACRT Arborist Training. In 2020, Jack graduated from the American Society of Consulting Arborists Consulting Academy. He has been involved in the tree care industry for more than 30 years and specializes in land-use issues and construction mitigation for trees.